Hello everyone!! I am happy to say I've gained a bit of my sanity back by grasping my ability to draw again with no problem with thinking about the next drawing I should do to further improve my skill but that is not what I have come here to tell you.
About a week ago when I was complaining about my artist block and not being able to draw at all, I finally figured out what I could do as a drawing and that being a volume cover art for the upcoming Comic/Manga I have been working on for the past year called Dark Rose.
A story about a kid named Ramel who stumbles upon a strange weapon, some you might not really see used unless in a book or TV show/movie, but then finds out something in his past kept secret from him since he was a little child. More info on the story later but today, I am going to show you a interesting picture that I made in Photoshop brushing up on my skills and see if I still had the touch on the Photoshop left in me and I ended up making this image with a interesting shade.
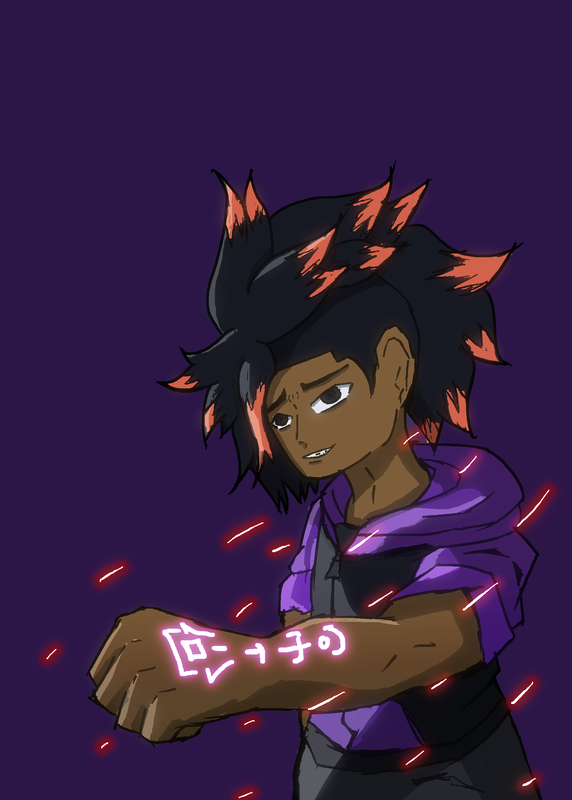 | Now I'm not going to lie to you I did have to look up tutorials on YouTube for how I could use some of the effects you see in this image and how you would use them to bring life to the drawing. I used a mix between using the select tool and the brush tool to get some of the flat colors to get the shade ready for more pzazz that you see in front of you. I copied a layer called masker that I was using to carefully see what was going on with what I could color and putting each of the flat colors in separate layers for one another finally cloning the masker with it selected and choosing a different color changing the layer to a [Linear Burn] and changing the opacity to 10% set hat color as my tone. Repeating the process I named a layer called shadow which pretty much explains it self and drew shading over the body and clothing that I felt seem right then adding highlight with a [Linear add] and using another layer for other glow I used two layer for this to get that color mixed in with purple and red. After I finished everything that was needed I went on ahead and copied all of the layers combining them into one layer the duplicating that layer using a [Gaussian blur] effect setting the layer to lighten and boom you have a shade for your picture. I hope you liked this photo and I will try to come out with more of these picture but for now, this is farewell. |
 RSS Feed
